
Paphiopedilum rungsuriyanum, 5 years to produce this flowering specimen
Most people have to some varying degree, an understanding of how plants in the nursery trade are produced. Generally, it is something along the lines of:
- Pollinate flowers
- Collect seed
- Sow seed
- Grow seedlings
At a very basic level, that is true. These tasks may seem quite simple, given most people’s familiarity with growing garden plants. For orchids however almost the entire process is complex and time consuming.
Step 1 – Acquisition
The first step in the production of orchids would more accurately be described as acquisition. That is, obtaining the plant material to be used for production. This may be obtaining flowering plants for breeding, plant material for cloning, or pods and seed for sowing. It sounds simple enough, but it does present some challenges.
The Law
In Australia, all our native orchids are protected by various state conservation acts. In addition to this, there are federally listed species of significance that are protected at a national level. It is not legal to obtain material from wild collected plants. There are some exceptions to this, such as plants that occur on private property and are not endangered species. The onus is on the nursery to ensure that all material is obtained via legal sources. There may even be additional requirements, such as the Biodiversity Conservation Act in NSW. Anyone selling native species to that state must be licensed to do so and be able to show the material has been legally sourced [1]. Finally, there is the Convention on International Trade in Endangered Species of Wild Fauna And Flora (CITES). All orchid species are at least CITES II listed [2], and many slipper orchids are CITES I listed species [3]. These species require CITES documentation (and of course fees) when being imported into the country. There are potentially other legal requirements such as expensive inspections and treatments to satisfy the Australian Quarantine and Inspection Service (AQIS). Of course, the easiest approach is to use plant material already in legal cultivation within Australia. As you can appreciate, Australia has a lot of laws and policies that affect acquisition and consequently make it quite the minefield.
Availability
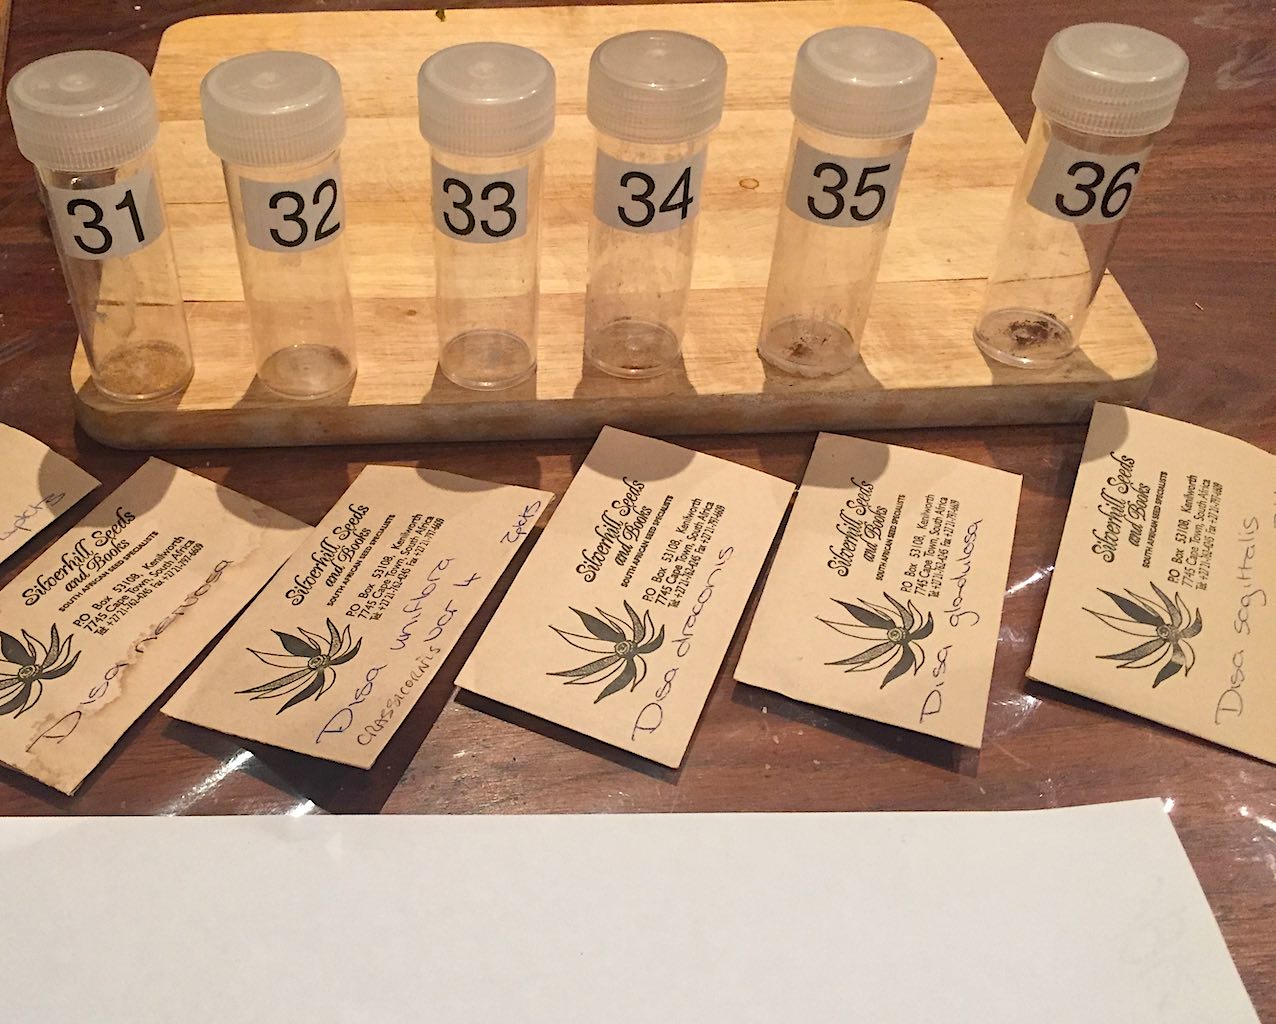
Seed acquired from South Africa
So just how much material is available legally within Australia currently? There is no way of knowing exactly. When you consider that there are currently an estimated 28,000 known species of orchids [4], it’s probably not hard to imagine that only a small percentage of them are cultivated. The reasons for this can be many and varied. All orchids will only germinate in the presence of a mycorrhizal fungus. These are a particular class of fungi that usually form mutually beneficial relationships with plants to facilitate their germination and growth [5]. As varied as orchids are in form, it’s not surprising then that some are highly mycorrhizal, and others are not reliant on their fungal partners at all. Terrestrial orchids are often highly mycorrhizal. Many species produce little or no roots. Some species exist completely underground, only surfacing to flower. Not even producing leaves to photosynthesise. In these species, the fungus becomes essential in supplying the orchids with nutrients, as the plants have little to no ability to do this. Cultivation of these species becomes an exercise in growing the mycorrhiza as well as the orchid. While not impossible to cultivate, the requirement of mycorrhiza adds considerable complexity. But orchids don’t simply use one type of fungus. There are literally countless combinations of associations. Some are highly specific and will only germinate with the presence of a specific fungus. Others will readily germinate and grow with many different species. The later can be observed in Australia with the spread of Disa bracteata across large parts of southern Australia, from WA to Victoria [6]. It’s ability to adapt to a wide variety of habitats and fungal partners has made it very successful in establishing itself here.
Availability may then be described as a function of how practical and adaptable a species is to cultivation. Very few species of orchids are as adaptable as normal garden plants, though Bletilla striata (the Chinese Ground Orchid) has managed to make the catalogues of garden bulb suppliers [7]. Of the 28,000 species, this is one of the few notable exceptions. We would hazard to say that most orchids are at least moderately difficult to cultivate. It is for this reason, most of them may remain unavailable in cultivation.
Pricing and Politics
Plant growers are a strange breed, and orchid growers are certainly no exception to this rule. Jealousy and (anti-)competition are rife. We have had growers actively prevent us from buying plants that they would otherwise sell to someone off the street, simply by virtue of being their competition. Others will play games when they know you want a particular species or clone that only they have, often increasing the price many times over what they would normally sell it for. Many people have shared similar experiences with us.
High quality awarded plants command high prices. As you’ll discover after reading this article, those prices after often quite rightly justified. Put simply, orchids require a huge investment in time and resources to produce. The time from germination to flowering plant may be 10 years or more. A 5 year old tree in a garden centre would cost many hundreds of dollars. It is not unreasonable then to expect that a 5-10 year old orchid would cost at least similar money. Acquiring seedlings is by far the most cost-effective approach, however there are pitfalls to doing this. As noted already, reaching flowering sized plants may take a considerable number of years. Waiting years before producing seed is not going to pay bills. Seedling plants may vary a lot in flower quality. Producing poor quality flowers is certainly not good for one’s reputation or business. Finally, seedlings aren’t always labelled correctly. We have received seedlings, only to flower them years later and find they are something entirely different to the label. Mistakes happen, it’s unavoidable. The only way to guarantee quality flowers that are true to label with quick production is to acquire quality mature flowering plants. The bottom line is that will be expensive.
Step 2 – Pollination
A brilliant form of Sarcochilus falcatus ready to be pollinated
The second step in the production of orchids is pollination. This could be entirely optional though if the orchid is to be cloned, which may use a bud.
Selfing
Orchids are one of the largest groups of flowering plants on the planet [8]. This huge diversity occurred because orchids to varying degrees try to prevent self-pollination. This genetic diversity is what has led orchids to colonise almost every habitat on Earth. This however proves to be a problem for the orchid grower. Many species of Dendrobium for example are believed to be self-incompatible. That is, if you take pollen from a plant, and put it on the stigma of its own flowers, the resulting pod will either abort or not produce viable seed [9]. We have personally witnessed this behaviour in many species. Selfing as it is known, is often used in plant production. It can be deliberate, where you want to produce a plant that is very much like the parent. It may be a highly desirable form where cloning is not practical or even possible. Selfing may also be the only option with limited plant material.
Outcrossing
In stark contrast, outcrossing is the crossing of two genetically unrelated individuals. This usually always leads to quality seed, viability and germination. Some caution needs to be taken however to avoid problems. Nowhere is this more evident than in native species Dendrobiums, particularly speciosum and tetragonum. These species have had many reclassifications of varieties and subspecies over the years. There are now 9 accepted varieties of Dendrobium speciosum, but that wasn’t always so [10]. Crossing with two unrelated plants that look quite different risks creating intervarietal hybrids or even primary hybrids when these forms later become taxonomically distinct. This is a fancy way of saying they may become recognised as two distinct varieties, subspecies, or even species by botanists.
Diversity
Maintaining genetic diversity for breeding plants is highly desirable. It may lead to better quality seed, and even more vigorous, healthy plants. Inbreeding in plants can cause similar issues to animals. Maintaining this diversity though presents quite a few challenges. It is often difficult to know a plants ancestry to determine if it is genetically distinct from another plant. We have found this with Dendrobiums, where plants acquired via two separate sources are crossed to produce no viable seed. It is common for rare plants imported into the country to be siblings or closely related to each other. Though rare, it is possible to get a small population of plants from a known locality. This might occur when native plants are being rescued for example. The progeny will maintain the characteristics of the plants of that provenance. It is also much less likely that hybrids between varieties and similar looking species are being created. As an added benefit, the plants are suitable for conservation purposes such as reintroduction into areas devastated by fires or other natural disasters. Unless they are miniatures, the downside to maintaining many plants for breeding is the considerable space they will occupy. For large species like Dendrobium speciosum, this may be 10 square metres.
Time
Time is the enemy of the orchid grower. Assuming a viable seed pod, the waiting begins until the seed can be harvested. As you may have by now guessed, this varies considerably within orchids. In some of our native terrestrial species it can be as little as 4-5 weeks. For epiphytes however, things are usually considerably longer. Sarcochilus dilatatus for example can be 12-14 months. Most epiphytes are probably in the range of 3-9 months. In that time, the plant will need to remain healthy. Extremes of weather, attacks from insects, rodents, and other undesirables can all cause the demise of the pod. Potentially delaying the process for another year.
Step 3 – Processing
Green pod starting to yellow
The third step in the production of orchids is processing. Typically, all processing is done with the intention of in vitro culture. This type of culture uses sterile vessels known as flasks with a suitable media for growth. Orchid seed is tiny like dust, as it contains no source of nutrients to start germination. This facilitates wind dispersal of seed, which many orchids employ. However, it means the germination of orchid seed will not happen without appropriate mycorrhizal fungi in nature.
Cloning
When a plant is to be cloned, meristem tissue is harvested from the plant to be cloned. Meristem cells are essentially stem cells. Cells that can to turn into any other type of cell the plant may require [11]. Shoot apical meristem is commonly used, which is tissue from a new shoot. This small amount of tissue will be used to proliferate cells on a special media know as multiplication media. The tissue is very vulnerable to infection from bacteria and fungi, so for this reason it will be grown in sterile conditions in vitro. The plant tissue is covered with all sorts of microorganisms that when introduced to the flask, will proliferate, and likely kill the orchid tissue. Before the meristem can be used, it needs to be processed. Once the tissue is carefully isolated from the plant with a scalpel, it is treated with a surface sterilant such as Sodium Hypochlorite (NaClO). It’s a careful balancing act, as the meristem needs to be treated long enough to kill all the microorganisms and spores that it harbours, but not long enough that it will kill all the meristem tissue.
Green Pods
Pods need to be collected in a way that maximises the chances of success. As the material collected will be sown in vitro, how it is collected and processed will determine if it can be kept contamination free. For the same reason as cloning, seed sown in vitro needs to be sterile. Contamination will cause the flask to be overrun by fungi or bacteria and usually die as a result. Fortunately, green pods are simple. The pod needs to be removed at the right time with enough stem intact to hold on to and easily work with. Harvest time depends on the species and genus. We usually wait until not long before the pod would dehisce (a few weeks), as you can be sure the seed is mature enough to germinate. If the pod is taken too early, the seed may not germinate well or at all. As the seed is contained in the plant tissues, it can generally be considered sterile. This means only the surface needs to be sterilised, which is logistically a whole lot easier than trying to sterilise the surface of thousands of tiny seeds. In addition to this benefit, a surface sterilant such as NaClO is only in contact with the pod and not the seed. Orchid seed of many species is easily killed by NaClO and other surface sterilising chemicals. Avoiding them altogether leads to the best possible germination. Another commonly used method to surface sterilise the pod is to flame it. This involves dipping the pod into alcohol and igniting it. This method reduced the waiting time to process the pod.
Dry Seed
 Dry seed is the least desirable approach. It simply has more avenues for things to go wrong. The seed needs to be collected more carefully than a green pod. Dry seed, as the name implies, needs to be always kept dry. Once the seed becomes wet, fungal spores can potentially start to grow and invade the seed. Once a fungus is in the seed, there is no amount of surface sterilising that will destroy it. It will simply contaminate the flask once it is sown. The ideal time to collect the pod is just before it starts to dehisce (split) to avoid the seed being exposed to moisture in the air, dew, or rain. In many species this is preceded by a change in colour of the pod, such as turning yellow or brown. Once this occurs, the pod can be removed and allowed to naturally split in a cool dry place. This process may take a week or so. To maintain viability, the dry seed then needs to be stored appropriately. We store seed in filter paper or small paper envelopes within small plastic ziplock bags with most of the air removed. The paper is absorbent and keeps the environment dry, while the plastic bag protects the seed from outside moisture. They will be stored in a fridge at around 3°C. The seed is sieved to remove any debris from the pod, as this can potentially be a source of infection or even harbour small pests. Stored in this manner, it is not uncommon to get germination from dry seed stored for 15 years.
As the seed will be in contact with the sterilant, the amount of time it is in the solution is important. Too long and the sterilant may kill the seed. Too short and the seed may not be properly sterilised leading to contamination. Once a flask is contaminated, often it can’t be saved. In addition to this, some species of certain terrestrial genera such as Cypripedium have germination inhibitors to ensure that the seed germinates in the right conditions. Various pre-treatments of the seed may be required for good germination, such as a solution of hydrochloric acid before surface sterilising or a lengthy soaking in NaClO. In addition to this, seed from cold climates may require other treatments such as stratification. Stratification is the process of cold treating damp, sown seed at near freezing temperatures for months to bring the embryo out of dormancy. Many cold climate terrestrial orchids require this. These complex requirements that differ across genera and species make treating seed complex, as you can’t simply have one process for all species. When working with a new species, quite often this data is unknown. You may end up with little or no germination because of it. It’s worth noting that green pods often don’t have the same issues with germination inhibitors as the seed is still immature, but often dry seed is the only option. Dry seed is the only way to receive seed from other countries, as green pods do not meet our quarantine requirements.
Step 4 – Sowing
The fourth step in the production of orchids is sowing on in vitro media. This is where things start to get more challenging. To grow a plant in vitro, it is imperative that a good aseptic technique is used. All potential pathogens need to be kept out of the flask. In a lab, this usually involves the use of a laminar flow cabinet. It provides a clean work area with filtered moving air that is free of spores and bacteria that would contaminate the flasks. The knowledge and skills required to maintain aseptic conditions are way outside of the scope of this article. Suffice it to say though, it has a fair learning curve and requires lots of patience and practice. For those interested, we run courses on Tissue Culture that will arm you with all the skills necessary to do this yourself. Flasks, media, and tools are all cooked under pressure at 115°C in an autoclave to sterilise them. All materials entering the clean work area are sprayed with alcohol to reduce the risks of contamination.
Cloning
In this stage, the sterilised meristem tissue is transferred in the vial to a clean work area. Again, it is surface sprayed with alcohol to reduce contamination risks. The tissue is then removed with sterilised forceps and placed into a flask containing multiplication media. We manufacture all our own tissue culture media, however tissue culture media can be purchased for around $6-$10 per litre. 1L will produce around 4 flasks, or slightly more using small flasks. The media may need to be different depending on what is being cloned, as not all genera respond the same. If this is sounding complex, it is. This is why very few plants are cloned, and it is generally only attempted for plants of exceptional quality.
Green Pods
Green pod sowing is a comparatively simple affair. In the event of flaming, our surface sterilised pod will already be in the clean work area. For pods in bleach, the vial is sprayed up with alcohol and transferred to the work area. While holding the pod with sterilised forceps, the pod is carefully cut open with a sterile scalpel and the contents are scraped into one or more flasks. The seed is spread around the surface of the media with forceps or another similar sterile tool. The media in the flasks is chosen based on the species being sown. Some species will germinate on acidic media, others will prefer a higher pH. Some species require a media with reduced nutrients or other specific requirements. Again, this means that one set of media can’t be used for all orchids, and often what works is a process of trial and error. This is a form of asymbiotic culture that will be discussed later. Culture without a mycorrhizal fungus present.
Dry Seed
There are two techniques for dry seed sowing. The first is symbiotic culture. Symbiotic culture is not generally considered commercially viable. It is used in some government funded conservation programs around the world, but these are typically very expensive due to the high labour involved. The process will be briefly outlined here, but it is not something we do in the laboratory. As we have already established, orchids in the wild germinate in the presence of mycorrhizal fungi. The idea behind symbiotic culture is to introduce only an appropriate mycorrhizal fungus for the species to be germinated. Sometimes it is the case that a particular fungal strain will germinate many species, other times the relationship is unique. This presents lots of challenges. Obtaining an appropriate mycorrhizal fungus is usually done from the roots of a plant growing symbiotically. As you might imagine, plants growing symbiotically are predominantly found in nature, and not in cultivation. So, a lab in Australia will not generally have access to mycorrhiza of slipper orchids in Asia for example, as importing them would be considered a biosecurity risk. Many of them can be soil pathogens. There are local species of fungi that will germinate species from other countries, though the only way to know how well they work is through trial and error. Compounding this problem is the complex process of isolation of mycorrhizal fungi. Like many other aspects of orchid culture, it is a process of trial and error.
Fungal hyphae (threads) invade special cells in the roots and form coils known as pelotons. Isolation of the mycorrhizal fungus is done by rupturing the cells from a small section of the plants roots under microscope. The pelotons are clearly visible and can be seen ejected into sterile water when ruptured. The pelotons are sucked up in a pipette and spread across a fungal isolation medium in a flask or petri dish. Orchid roots are far from clean surfaces, so the media will grow a whole plethora of fungi and potentially bacteria. The resulting fungi are then subcultured on more medium to try to create a pure strain which can then be tested with orchid seeds to see if it germinates it. Mycorrhizal fungi require their own special culture media. A media used for asymbiotic culture will have too many nutrients and the fungus will become too aggressive and kill the orchid seed. They are typically sown on oats media. It is a mix of water, a gelling agent such as agar and powdered oats which provides a starch for the fungi to consume. The seed is filtered to remove the sterilant and rinsed with sterile water. This is all done in a clean work area to minimise risk of contamination. The seed is then spread across the surface of the oat medium. Finally, a plug of the mycorrhiza culture is added to the flask to invade the seed and start germination.
Asymbiotic culture is how almost all orchids are produced commercially. This involves adding the seed to a nutrient rich media that the seed will absorb and begin to germinate. For some species, this works exceptionally well. For other species, germination may be quite low or non-existent. As with symbiotic culture, the seed is filtered to remove the sterilant, and rinsed with sterile water. The seed is then spread across the surface of the flasks with sterile tools such as forceps. All this is done in a clean work area. As was the case with green pods, the choice of media will determine how successful germination is.
Step 5 – Germinating

Seed germinating
The fifth step in the production of orchids is germinating them on in vitro media, or in the case of cloning, proliferating the cells. This is known as callus formation. There are a lot of factors that influence the success of this stage. The ability to keep the flasks clean and contamination free is often a big factor. Contamination can undo all the hard work up to this point in merely hours. Early contamination can be treated if it is isolated by scooping out the infected area on the media and treat the area with hydrogen peroxide. Hydrogen peroxide breaks down into water under light so it will not be harmful to the seeds.
The environment the flasks are incubated in will also greatly affect the result. We have a temperature controlled environment with 24/7 air conditioning and timer controlled lighting. The setup cost of this and associated power costs would knock your socks off. It’s powered by a 30kW solar and battery system to keep the costs down or the business would not be feasible with today’s energy prices. Other species may require incubation in the dark, so these need to be stored in a separate area away from the lights. Again, no single process can be used for all species. It’s trial and error to see what works best.
Cloning
Once the meristem has formed calluses, the calluses can be cut up and transferred to a culture medium to induce plantlet formation. Again, this is done in a clean work area under aseptic conditions. As with seed sowing, the choice of media will influence the success rate.
Seed
At this point, there is no difference between green pods and dry seed. Both are seed sown on a nutrient rich media and incubating. From this point, we will only discuss asymbiotic culture. There are some excellent resources if you wish to learn more about symbiotic culture. The time required for germination to occur may be as little as a week but is typically around 4-8 weeks. One of a few things can happen from here. The seed will swell and form what is called a protocorm. Essentially, it’s a mass of cells, sometimes with hairs radiating out called trichomes. Depending on environmental factors, the protocorm may keep growing and form a small plantlet, or it may just stop and not proceed any further. This is the result of some requirement of the plants growth not being met. In some cases, the protocorms may even kill each other. The reasons for this are not entirely understood, though it is believed to be a mechanism to avoid competition with other seedlings.
Step 6 – Replating

A mother flask replated into three new flasks
The sixth step in the production of orchids is known as replating. It is the process of transferring the plantlets to new flasks and thinning them out. Depending on the number of plantlets, this may occur just once, or many times. How long it takes before replating can occur varies depending on the vigour of the species in vitro. It may take a few months, though it is usually much longer. For some terrestrial species, it may be up to 12 months. Replating of many species early is critical. As noted already, some species will kill each other. It is imperative that these species are separated early to avoid them doing this. Other species produce hairy roots which bind to each other, making replating extremely difficult without damaging the plants. For terrestrials, tuberous species will send down a root known as a dropper to produce a new tuber. It is important to replate these species at this point to avoid damaging the dropper and while the plantlets are still easy to handle. Replating as with previous steps, is performed under aseptic conditions in the clean work area and involves plucking the little plantlets out with sterile tools such as forceps. This can be quite fiddly and time-consuming work.
Step 7 – Finals
The seventh step in the production of orchids is known as finals, or final flasks. These are intended to be the last replate of the plants before they are removed from their flasks. The exact time that this takes varies wildly between species. For some species, this stage can be reached in as little as 12 months, for others this might be 2 years or more. The process is essentially the same as for replating, only the plants are now much bigger, so sufficient space needs to be allowed for them to attain their final size.
Step 8 – Deflasking

Deflasked Paphiopedilum rungsuriyanum
The seventh step in the production of orchids is known as deflasking. This is the process of removing the plants their flasks and cultivating them under nursery conditions. To get to this point, some species may take as little as 18 months, but many will take much longer. Deciduous terrestrial species may take 2-4 years. They experience dormancy in flask just as they do in nature, so the time required to get mature plants is much longer than other species. Newly deflasked plants are quite vulnerable. They have grown in an environment with 100% humidity, no pathogens and all the nutrients and water they need. The leaves and roots are typically different from those in nature, as they have adapted to the unique conditions provided to them. The process involves slowly acclimatising the plants to the outside world without damaging them, as this will set the plants back or even kill them. Losses at this stage can be very high if the process is wrong. As you may well have guessed by now, no one process works for all orchids. A species such as Lepanthes needs to be grown in a cool super humid environment like a jar or mini greenhouse. Yet if you provided these conditions for a Dendrobium speciosum, you’d end up with a rotting mess. Some species can be taken out of flask and put straight out in the greenhouse. Others need protection from drying air to prevent damage to the leaves and roots which may happen in a matter of minutes. The whole process and all its complexities are well outside of the scope of this article, but you can read our guide on deflasking here.
Step 9 – Growing
The last step in the process is growing the plants to a point they can either be sold as seedlings or mature flowering plants. Not all plants from flask are seedlings. Many miniature species may be full size or near flowering size when removed from flask. It is not uncommon to flower these plants within 12 months from flask. Other miniatures though may require 3-4 years to reach first flowering. For large species like Phragmipedium kovachii or Dendrobium speciosum, this can be 7-10 years. Assuming the plants survived deflasking, growing them on is no trivial task. Some species are magnets for pests, particularly the rare and endangered ones. The conditions required for each species vary wildly. Trying to cater for all the different genera and species is quite the logical challenge, as it requires many different microclimates for them to grow and succeed. Many orchids have distinct cycles of flowering, growth, and dormancy. Even from tropical areas. Species from hot growing areas tend to have two seasons. A wet period in which the plants grow, and a dry season where the plants may even fully or partially defoliate. Conversely, species from areas with hot dry summers are likely to be winter growing and dormant during summer as underground tubers. Often these competing conditions can be partially or totally impractical for the plants to be grown in one environment. Providing all these different growing areas requires a large investment in land and resources to house them. Depending on the local climate, specialist houses may be required to protect the plants from the elements. In some situations, heating and cooling may also be required with very high energy costs. Other considerations are water and water quality. In Adelaide, the water is generally considered average-poor quality with some areas barely meeting World Health Organisation standards for drinking water. Many orchids are sensitive to the dissolved salts in water, so a cleaner water source may be necessary. A large rainwater tank and pump is many thousands of dollars.

First flowering of Paphiopedilum tigrinum, 9 years from flask
Conclusion
If you got this far, you may now appreciate that there is an awful lot that goes into producing an orchid. When you consider the specialist knowledge, specialist equipment, high energy and water costs, huge investment of labour and time required from pollination to flowering a plant, it’s no wonder then that orchids can command high prices. Though bizarrely, some orchids are priced considerably less than an equivalently aged nursery plant. The poly pack orchids are a great example of this. These are seedlings sold in plastic packaging at the garden centres of certain large chain stores. At around $10, once you take out GST, retail profit margin, the cost of transport and packaging, and finally the cost of producing the plant, it’s unlikely the nursery is making $3 per plant. From pollination to sale in the store was likely 2-3 years. Consider this, would you be happy earning $3 for a product that took you 2-3 years to produce? As a business model, you’d be better off selling coffees. It would probably be fair to say that the production of orchids is barely profitable and is more a labour of love [12].
References
- Biodiversity Conservation Act 2016 No 63 – https://legislation.nsw.gov.au/view/html/inforce/current/act-2016-063
- Orchidaceae – https://cites.org/eng/taxonomy/term/12265
- Appendices – https://cites.org/eng/app/appendices.php
- Orchidaceae – https://en.wikipedia.org/wiki/Orchid
- Mycorrhiza – https://en.wikipedia.org/wiki/Mycorrhiza
- South African weed orchid (Disa bracteata) – https://vro.agriculture.vic.gov.au/dpi/vro/vrosite.nsf/pages/potential_african_weed_orchid
- Chinese Ground Orchid Pink – https://www.tesselaar.net.au/product/1794-chinese-ground-orchid-pink
- Asteraceae – https://en.wikipedia.org/wiki/Asteraceae
- Incompatibility in Dendrobium (Orchidaceae) – https://www.researchgate.net/publication/229999274_Incompatibility_in_Dendrobium_Orchidaceae
- Dendrobium speciosum – https://powo.science.kew.org/taxon/urn:lsid:ipni.org:names:628644-1#synonyms
- Meristem – https://en.wikipedia.org/wiki/Meristem
- The era of cheap orchids could soon be over – https://www.theguardian.com/lifeandstyle/2022/nov/13/the-era-of-cheap-orchids-could-be-over