 Deflasking – Preamble
This is the process whereby seedlings and clones of orchids that have been produced and raised in the environmental safety and luxury of a flask are removed from the flask and ‘introduced’ to standard orchid nursery conditions.
Orchid seedlings and clones are raised under sterile conditions not because they need that but because the medium they are grown on would become so contaminated with bacteria and fungi that they would destroy the orchids.
There is ABSOLUTELY no need then to try to maintain anything remotely sterile at or after deflasking. Applications of bactericides, fungicides or any form of antimicrobials is a total waste of time. If it appears they are needed, then the conditions you are subjecting your seedlings to are unsatisfactory and IT IS THE CONDITIONS OR PRACTICES that need to be changed.
Each grower has at least slightly different conditions so you must learn what works best at your location. There are guiding principles that may help though.
The aim is to start off by avoiding extremes for the genus concerned and to not expect your tiny seedlings to endure conditions that you would not dream of subjecting a mature plants of similar breeding to. I sometimes use slightly reduced light to that which similar mature plants enjoy and protection from temperature extremes for a short time to enable the plantlets to toughen up as quickly as possible so that they can adjust, toughen and become as hardy as the parent plants. The aim is to harden he seedlings off to standard conditions for that plant as quickly as actually possible.
In mid-Autumn to early Spring I usually deflask immediately to a location alongside their peers. Other than that I may recommend some brief period of protection. Air movement, adequate light and fertilizer are essential right from the day of deflask or they may rot, they may have insufficient light to generate energy to grow and they sure won’t grow without nutrient. Weak fertilisers are safest and best and should be applied at each watering.
I don’t believe use of the likes of ‘Envy’ or ‘Vapour Guard’ are needed but if you must use such products then assure the roots don’t get coated in it or they won’t work!
Preparation
Not absolutely necessary in all cases, but it might help to remove the flask lid or bung for 3 – 10 days to expose the plantlets to drying while their roots are still able to draw moisture from the agar. This may toughen many genera. Bacterial or fungal growth should not be a problem as the plantlets will have removed most sugar and nutrient by the time they are ready for deflasking and 3 – 10 days is not time enough for damaging amounts of bacterial or fungal growth to occur anyway.
 Removal

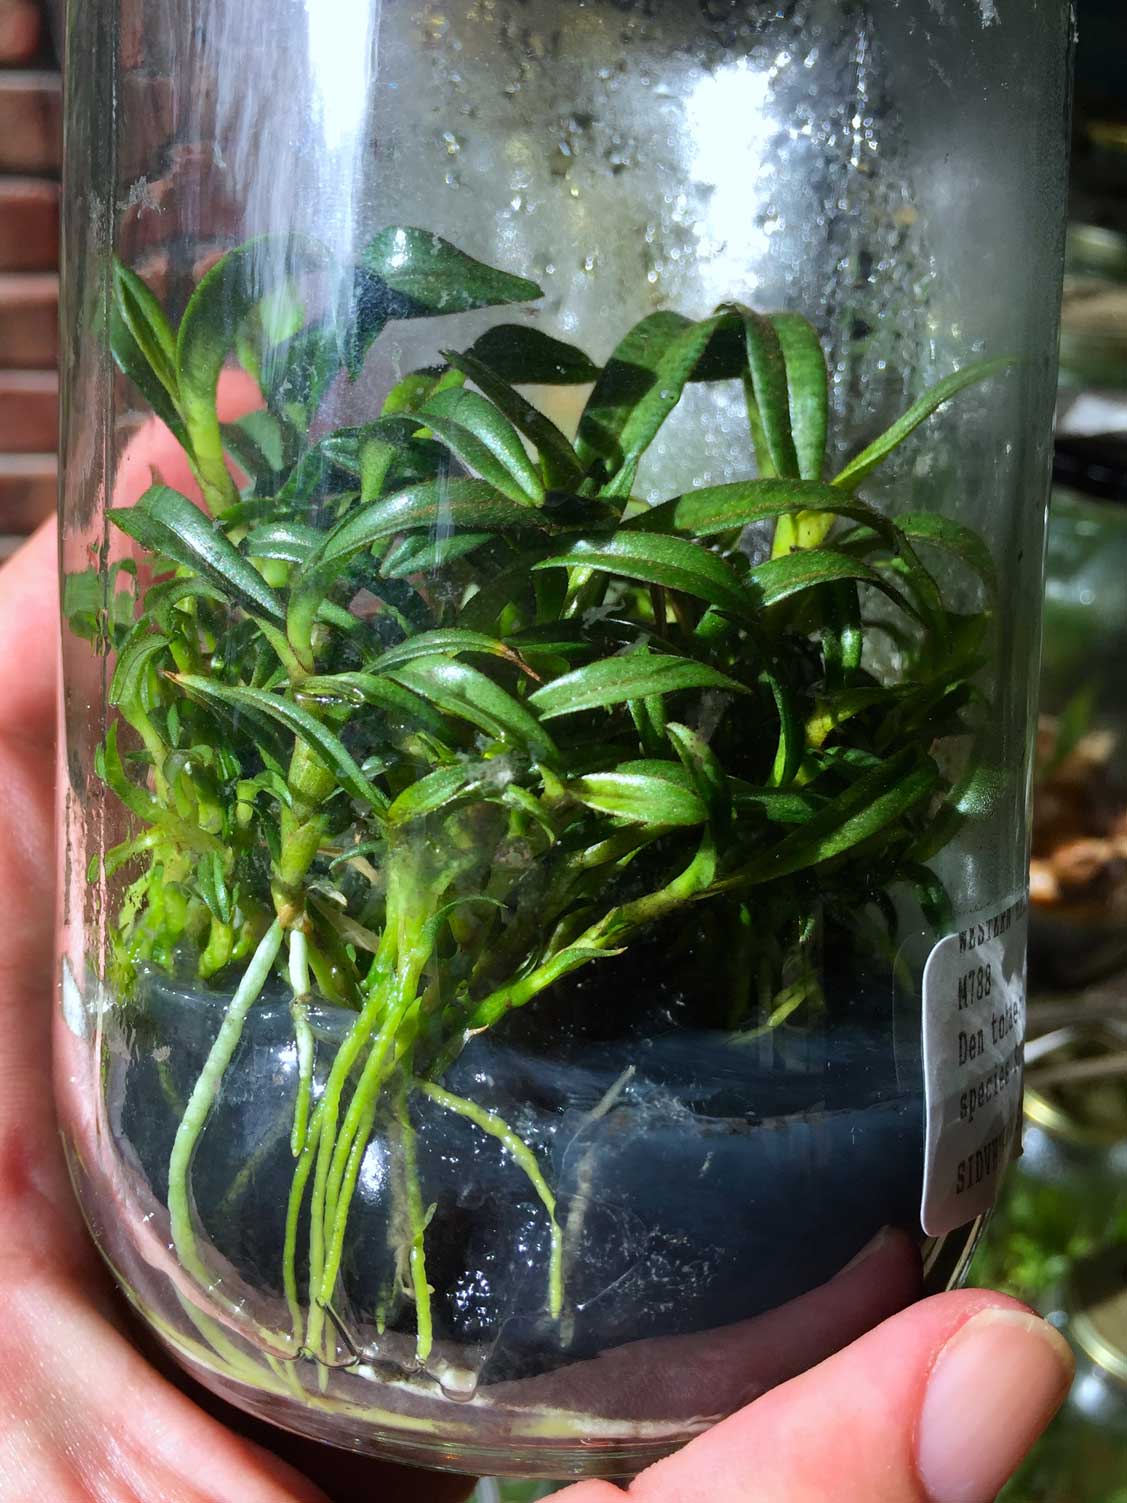
Deflasking starts with the removal of the plants from the flask. Conical flasks usually need to be broken if the roots are too entangled to remove the plants separately without damage to their roots. Plants in straight‑sided flasks are easily removed as a plug of roots and agar without risk of damage.
Washing
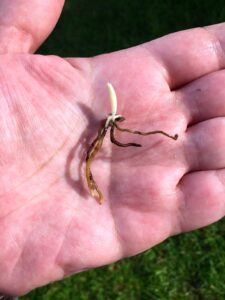
After removal from the flask, the agar can be removed from the roots by a moderate to vigorous stream of water from a garden hose with the plants supported in the hand or on a fine wire sieve. Even plants with brittle roots may have the agar removed by careful use of this technique. Generally, whilst desirable, it may not be essential or possible to remove all the agar from the roots as by the time the plants have grown large enough to deflask, there may be very little nutrient or sugar left in the agar so it will not be a source of fungal rot when potted out.
Optimal Season
With a little care and some experience, most plants can be removed from flasks at most times of the year if care is taken to avoid extremes of hot and cold. I tend to prefer early autumn and early spring then cool periods in summer and try to avoid mid‑winter unless your climate or conditions are suitable then also. Growers with temperature and humidity‑controlled glass houses can deflask whenever it suits them. Conversely, deciduous and many terrestrial orchids may be fussy in the extreme as to when they can be deflasked so you had better do some research there.
 Planting Out
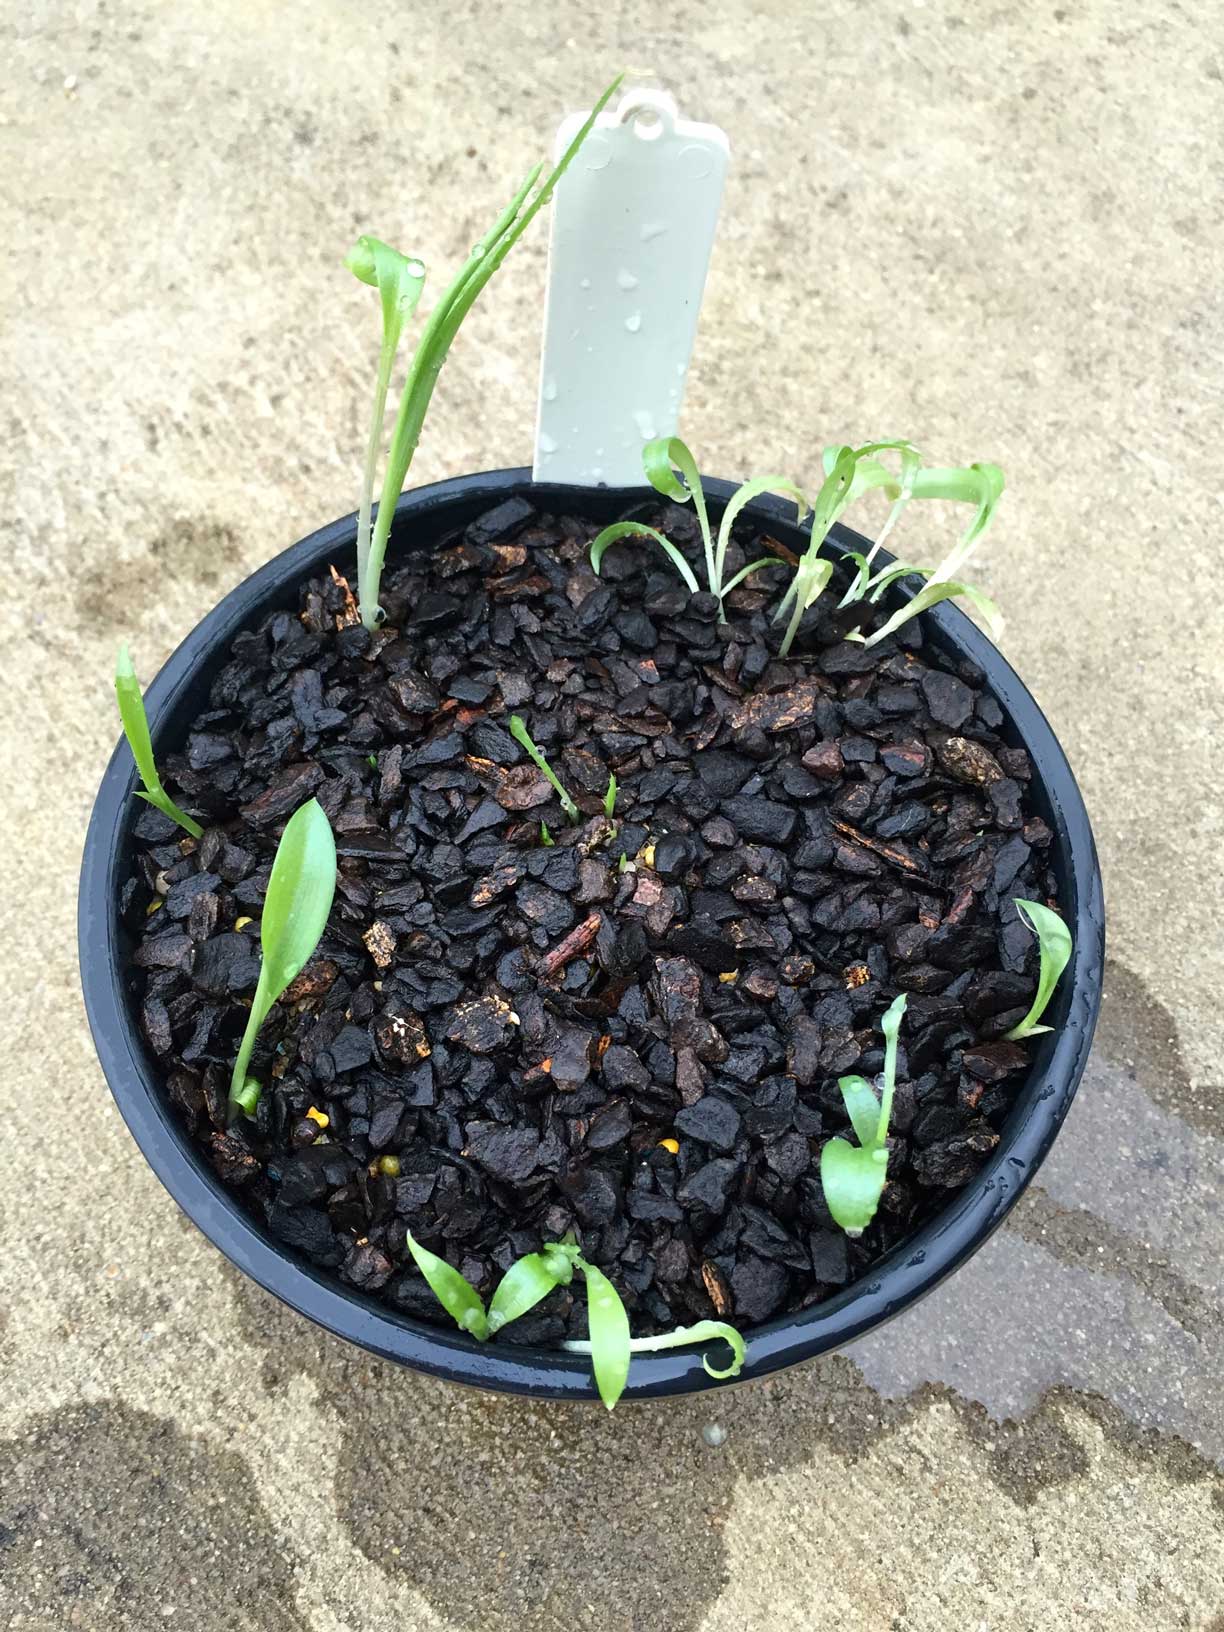
It is preferable to separate the seedlings and to grade and pot them together or singly depending on their size. Sometimes it is impossible to separate the plantlets without causing significant damage to many roots. If this is the case, then it is preferable to plant the whole lot as an intact clump and wait for the seedlings to grow on and make new roots. At repotting time it will be fairly easy to separate the plants without damage to the new roots. Quite large plantlets are best potted singly and seem to do far better that way. Smaller ones can be planted into community pots either in rows across the pot or as a ring around the perimeter of the pot. I find that ‘perimeter planting’ permits easy fertilising at the centre and I believe that growth is faster. [ It uses more pots and takes more time though. ]
Potting Medium The medium chosen must be suitably water retentive. It must be well aerated and not be too prone to compaction or settling. Recent experiences are indicating that clean, smaller particle size medium results in better root growth and plant survival. The medium must be clean and free from any toxic elements. Most of the successful media have very low inherent nutrient levels and thus require fertiliser additions for good, balanced plant growth
Some possible potting mixture components –
Sphagnum Moss – An excellent starting medium for many genera if rain water is available or if the tap water supply is not too hard or alkaline.
IT MUST NOT BE TIGHTLY PACKED. Only exceedingly weak liquid fertilisers can be used with sphagnum moss but it is nevertheless often most satisfactory. After 1-2 years the moss begins to fail so plants need repotting either to either new moss or to more standard medium that works for you on similar mature plants. Sphagnum moss is expensive so it is often used diluted with isolite at 1:1 or 2:1 probably with equal success.
Good quality horticultural Perlite alone can be used to start orchid seedlings and clones at deflasking. I have done so using deep profile pots and even stood the pots in about 3cm of very dilute fertiliser solution during summer. Deflasked orchids may need to be partially covered or may be left open depending on temperature and humidity at the time of deflasking. We have had good results with Australian Cymbidiums and their hybrids and with Paphiopedilum and Disa.
Pure perlite is OK for many orchids especially disa & cymbidium. If deflasked into pots; the pots must be stood at all times during warmer months in about 3cm of dilute fertiliser that is refreshed weekly. It is also possible to plant into an intact foam box with a 1cm hole placed 3cm from the bottom of the box so it will hold 3cm of fertiliser solution & almost full of 3-4mm particle size perlite. This produces very rapid growth of seedlings. Some cyms have flowered in 18 to 22 months after deflask.
 Mounting Orchids
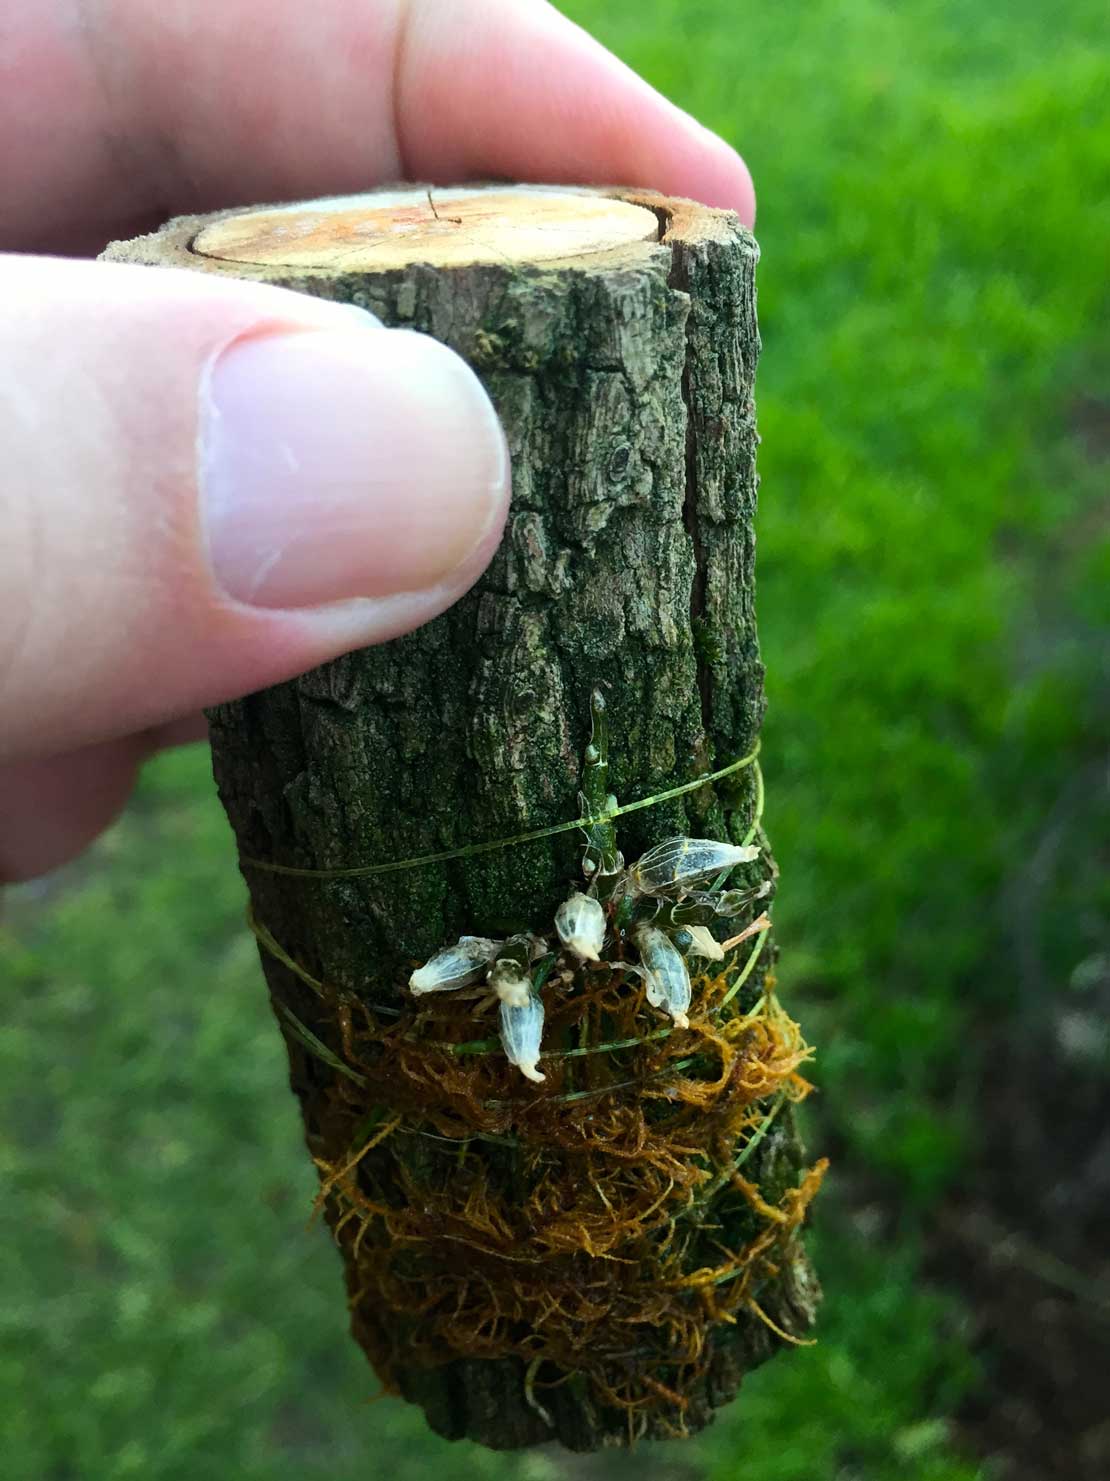
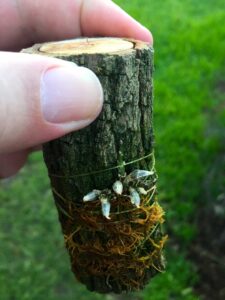
Many genera have species and hybrids that are virtually impossible to grow in standard orchid potting mixes in pots and these are best grown on suitable mounts. This is often a very specialized area of expertise and is best done by consulting and copying a competent individual in your general location. Materials that we have found to be suitable have comprised callistemon branches both large and small, western red cedar strips, meranti and similar strips, cork bark, slabs of bark from old pine trees and some people do quite well with some forms of treated pine but I can’t bring myself to use or recommend the latter.
Environment
This requirement needs to be considered well as it will vary according to the orchids involved, the prevailing weather conditions such as humidity or drying winds, the grower’s watering habits, the city or area involved and other local environmental effects.
The aim is to provide sufficient shade, humidity, water at suitable intervals, air movement, fertiliser and pest control to enable the deflasked plants to survive, adjust, toughen and grow and to progressively but quickly harden the plantlets until they can grow alongside other similar, established plants. This is best done by consulting with growers of similar plants in similar surroundings and blending that information with your own beliefs.
Most orchid seedlings can be transferred directly from flask to slightly to thoroughly protected, airy, temperature‑controlled glass houses without additional support other than slightly lower light levels at first.
Most cymbidium seedlings or mericlones can be transferred directly from the flask to a, cool, shady, sheltered location in the shade house. I have done so frequently placing the pots of newly deflasked plants in wire baskets or trays supported on bricks , close to the ground under the benches for 14 to 20 days before putting them on the more protected bench areas with mature plants.
Growers wishing to deflask more delicate types of orchids can do so by placing the pots of deflasked seedlings or clones inside plastic bags. The bags can be sealed during day time with rubber bands or ties to maintain high humidity, but should be wholly or partially opened at night depending on temperature, to allow the plants to toughen and to avoid fungal problems. Close observation of the plantlets will soon reveal whether more or less fresh air is needed. I am absolutely positive tht when they don’t do well we have usually very much molly–coddled our seedlings to death. I have seen infinitely more deflasked plants die from being too wet, too humid and too stifled with too little light than I have ever seen die from dessication, low humidity, some fresh air and modest light levels.
During very harsh conditions the time under protection may need to be extended and at ideal times some species may be put immediately outdoors alongside their parents e.g. Disa and some Aust terrestrials when deflasked in late autumn to late winter or very early spring and cymbidiums for all but the hot summer months in Adelaide South Australia. This will differ from genus to genus depending on the conditions where you live.
Fertilising
This is essential and should be quite dilute – about 250 to 500 ppm seems to be quite OK and practically translates to one level teaspoon of solid fertilizer dissolved in 10 Litres of rain water.
You can safely use whatever regimen you already successfully apply to your similar mature orchid plants but no fertilizer = no decent growth!